
Assalamu Alaikum Wa Rahmatullahi Wa Barakatuh!
Welcome to another helpful WordPress tutorial. I hope you are doing well by the grace of Allah.
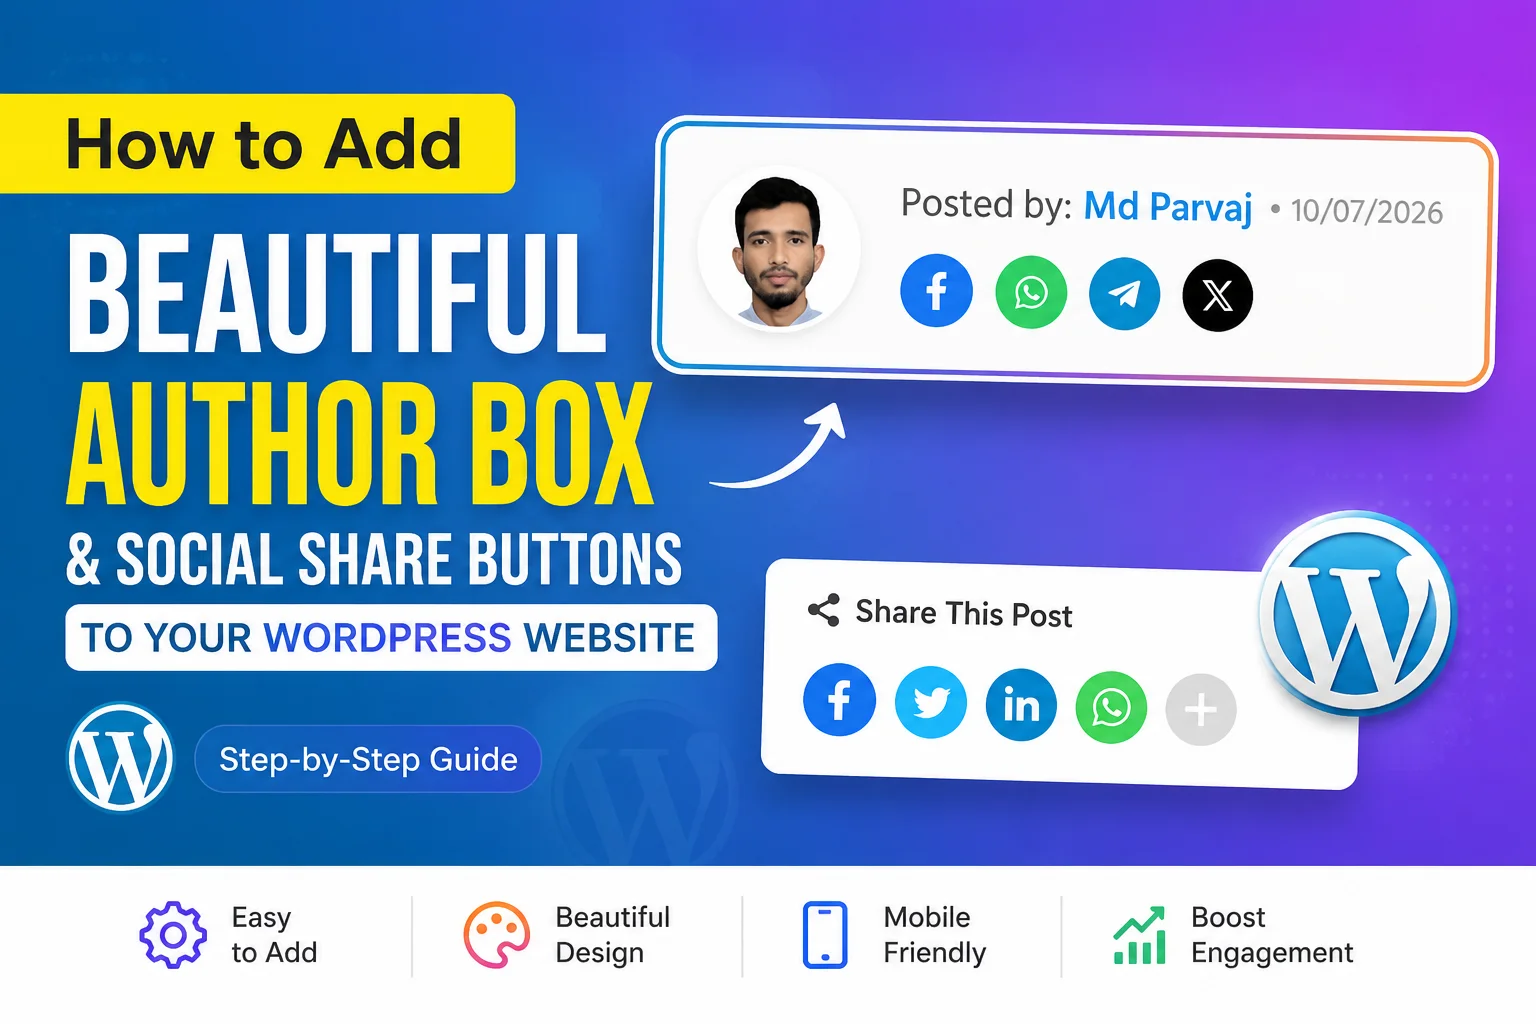
In this guide, you’ll learn how to add a beautiful Author Box and Social Share Buttons to your WordPress website in 2026. A well-designed Author Box helps readers learn more about the author, builds trust, and gives your website a more professional look. At the same time, Social Share Buttons allow visitors to share your content on platforms like Facebook, WhatsApp, Telegram, and X (Twitter), helping you reach a wider audience.
👉👉 Open a RedotPay Account, Earn $5, and Make Money with Referrals – No Investment Required 2026
Whether you run a personal blog, news website, or business site, adding an Author Box can improve user engagement, strengthen your brand identity, and even support your SEO efforts. This step-by-step guide is beginner-friendly, so you can easily add an Author Box and Social Share Buttons to your WordPress site in just a few minutes.
Let’s get started!
What is an Author Box?
An Author Box is a dedicated section that appears at the end of a blog post or article, displaying information about the author. It typically includes the author’s name, profile photo, short bio, and links to social media profiles or the author’s website. Adding an Author Box helps build trust with readers, strengthens your personal or brand identity, and gives your WordPress website a more professional appearance.
If you’re using WordPress, a well-designed Author Box is a great way to make your content stand out. The premium Author Box featured in this tutorial is designed with a modern, clean layout that can easily match your website’s branding. For example, you can simply change the color scheme to fit your site’s theme without making any other major design changes.
👉👉👉 Top 20 Video Watching Apps That Pay Real Money in All Countries
This premium Author Box not only enhances the visual appeal of your website but also improves user engagement by allowing visitors to learn more about the content creator. Whether you’re a beginner or an experienced WordPress user, you can easily add and customize this Author Box to give your website a stylish and professional look.
How to Use the Author Box?
Using this Author Box on your WordPress website is very simple. It has been designed with a clean and premium layout, so you can easily customize it to match your website’s colors and branding. You don’t need any advanced coding knowledge—just follow a few simple steps, and your Author Box will be ready in minutes.

Below, I’ve included a screenshot showing where I placed this Author Box on my website. If you’d like to display it in the same position on your WordPress site, you can follow the exact method shown in this tutorial.
👉👉 Blogger JetTheme Premium V4.9 – 2026 সালের আপডেটেড ভার্সন, এখনই অল্প টাকায় সংগ্রহ করুন!
Don’t worry! I’ll guide you through the entire process step by step. After that, I’ll also provide the complete Author Box code so you can simply copy and paste it into your website without any hassle.
Step 1: Log in to Your WordPress Dashboard
To add the Author Box to your WordPress website, the first step is to log in to your WordPress Admin Dashboard.
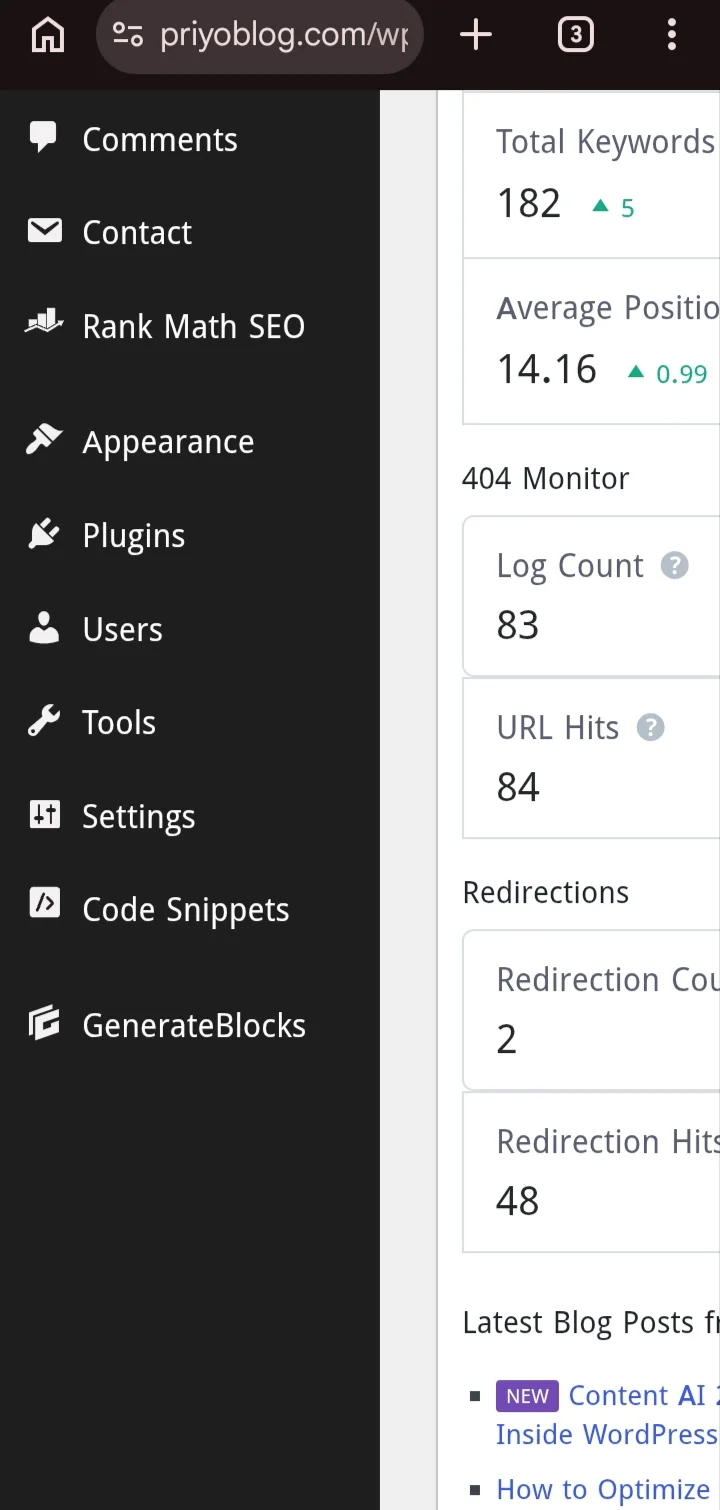
After logging in successfully, you’ll see the WordPress dashboard, similar to the screenshot below. From the left-hand menu, click on Settings to continue with the setup process.
Follow the screenshot carefully so you can navigate to the correct option without any confusion. In the next step, I’ll show you exactly what to do after opening the Settings menu.
Step 2: Open the Code Snippets Option
After clicking on the Settings option, you’ll see several menu items appear in your WordPress dashboard. Among those options, look for Code Snippets and click on it.
The Code Snippets plugin allows you to add custom code to your WordPress website safely without editing your theme files directly. This makes it the perfect place to add the Author Box code.
Once you’ve opened the Code Snippets section, follow the screenshot below carefully and proceed to the next step. In the following section, I’ll show you exactly how to create a new snippet and add the Author Box code to your website.
Step 3: Click on Add Snippet
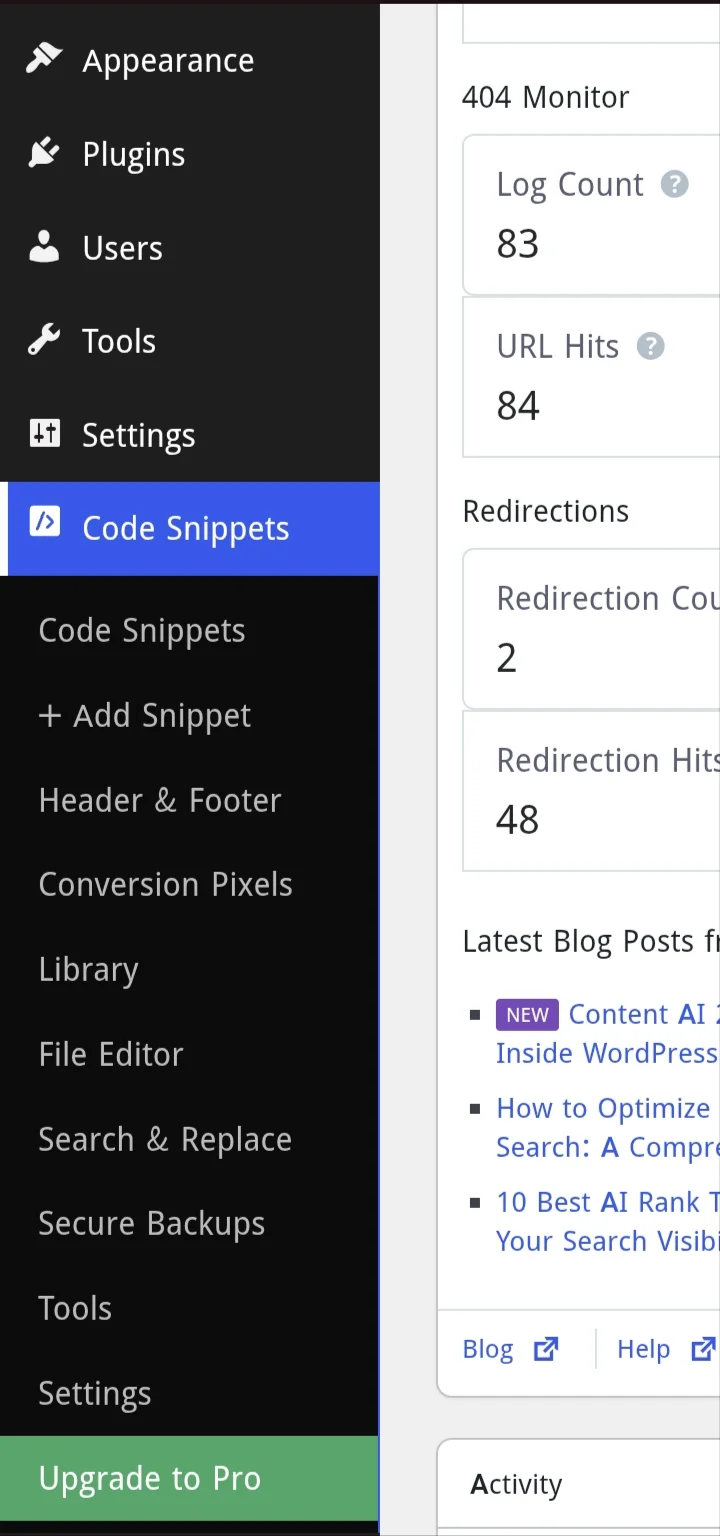
After opening the Code Snippets page, you’ll see an interface similar to the screenshot below.
Now, click on the Add Snippet button to create a new custom code snippet for your Author Box. This option allows you to add new PHP, CSS, or JavaScript code to your WordPress website without modifying your theme files.
Once you’ve clicked Add Snippet, you’ll be taken to the next screen. Simply follow the screenshot below, and I’ll guide you through the rest of the setup process step by step.
Step 4: Select Add Custom Snippet
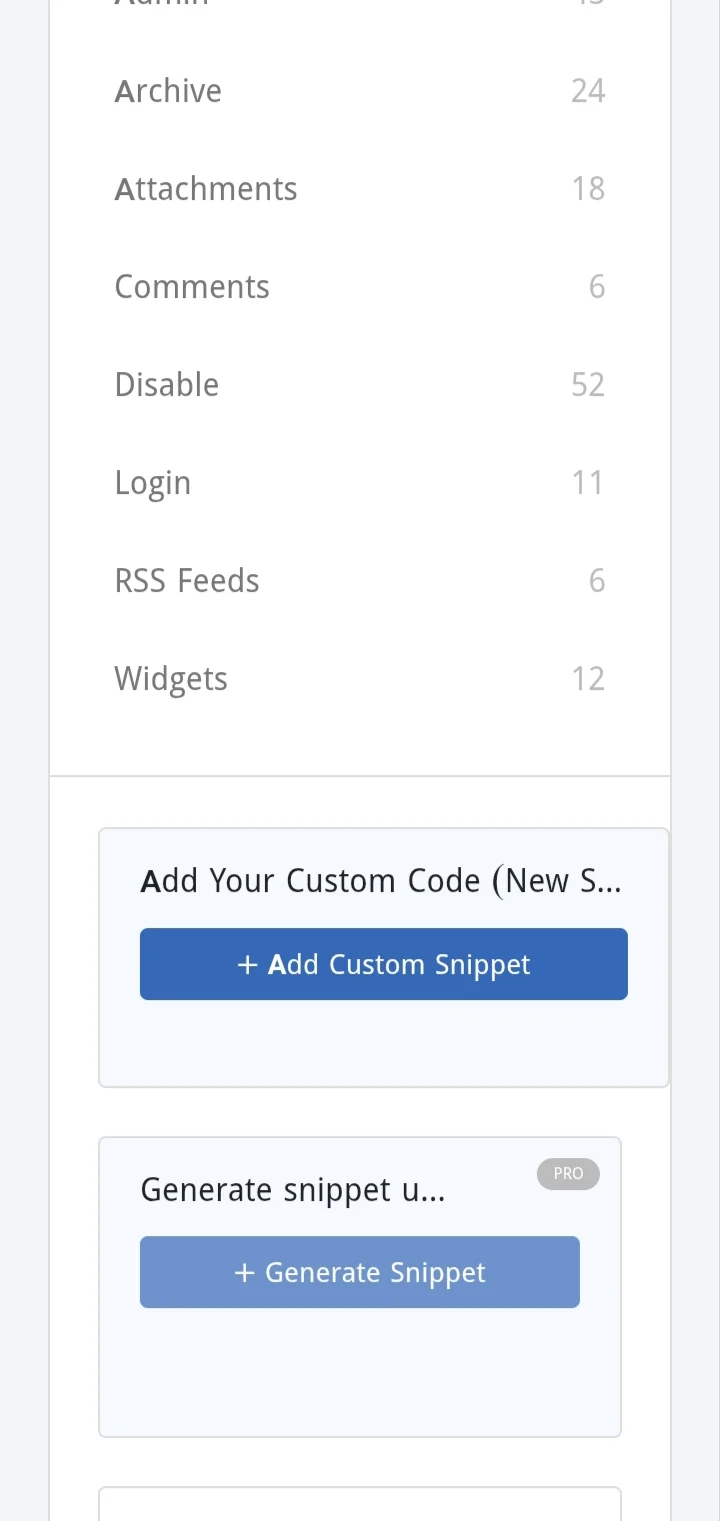
Now, look at the screenshot above. You’ll see an option called Add Custom Snippet. Click on this option to continue.
After clicking Add Custom Snippet, you’ll be taken to a new page. Follow the screenshot below carefully. On this page, you’ll see a large code editor (box). This is where you’ll paste the Author Box code.
Once you’ve pasted the code into the box, we’ll configure a few simple settings before saving and activating the snippet. Just follow the next screenshot, and you’ll be ready to add a beautiful Author Box to your WordPress website.
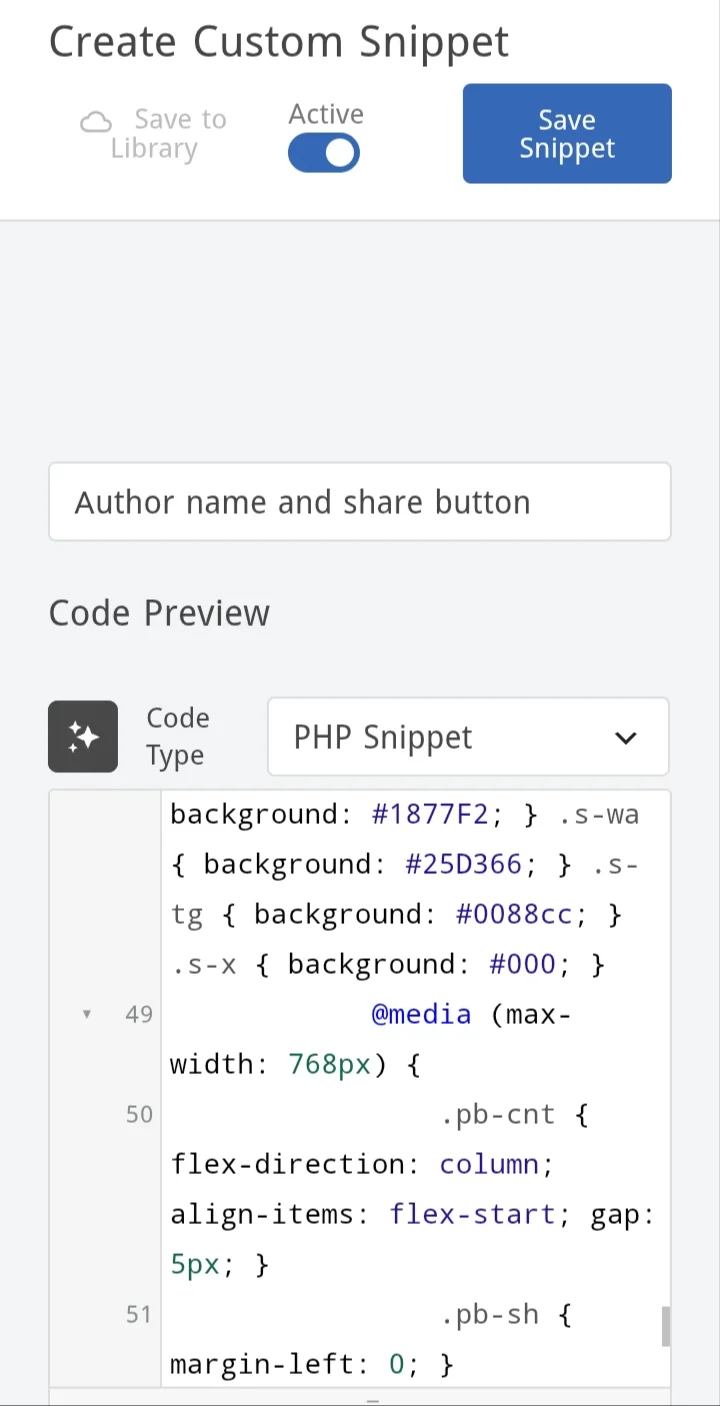
Step 5: Paste the Author Box Code and Activate It
Now, follow the screenshot above carefully. As you can see, I’ve already pasted the Author Box code into the code editor to make the process easier for you to understand.
Once the Custom Snippet editor opens, simply copy the Author Box code provided below and paste it into the code box, just like in the screenshot.
Before saving the snippet, there is one important setting you need to check. In the top-right corner, you’ll see a Save button. However, don’t click Save just yet.
First, look just to the left of the Save button. You’ll find an option called Inactive/Active. By default, your snippet will be Inactive. Click on it to change the status to Active, just as shown in the screenshot.
After activating the snippet, click the Save button to save your changes.
That’s it! 🎉 Now visit any post on your WordPress website, and you’ll see your beautiful Author Box displayed automatically with a clean, premium, and professional design.
 add_action( 'generate_after_entry_title', 'pb_one_line_author_share' );
function pb_one_line_author_share() {
    if ( is_single() ) {
        $post_url = urlencode( get_permalink() );
        $post_title = rawurlencode( get_the_title() );
        $author_id = get_the_author_meta( 'ID' );
        $author_url = get_author_posts_url( $author_id );
        ?>
        <div class="pb-box">
            <div class="pb-inner">
                <div class="pb-av">
                    <a href="<?php echo $author_url; ?>">
                        <?php echo get_avatar( $author_id, 55, '', '', array('class'=>'p-img') ); ?>
                    </a>
                </div>
                <div class="pb-cnt">
                    <div class="pb-meta">
                        Posted by: <a href="<?php echo $author_url; ?>" class="p-nm"><?php the_author(); ?></a>
                        <span class="p-dt">• <?php echo get_the_date(); ?></span>
                    </div>
                    <div class="pb-sh">
                        <span class="s-lb">Share:</span>
                        <div class="s-ic">
                            <a href="https://www.facebook.com/sharer/sharer.php?u=<?php echo $post_url; ?>" target="_blank" rel="nofollow" class="si s-fb"><svg viewBox="0 0 320 512"><path d="M279.14 288l14.22-92.66h-88.91v-60.13c0-25.35 12.42-50.06 52.24-50.06h40.42V6.26S260.43 0 225.36 0c-73.22 0-121.08 44.38-121.08 124.72v70.62H22.89V288h81.39v224h100.17V288z"/></svg></a>
                            <a href="https://api.whatsapp.com/send?text=<?php echo $post_title . '%20' . $post_url; ?>" target="_blank" rel="nofollow" class="si s-wa"><svg viewBox="0 0 448 512"><path d="M380.9 97.1C339 55.1 283.2 32 223.9 32c-122.4 0-222 99.6-222 222 0 39.1 10.2 77.3 29.6 111L0 480l117.7-30.9c32.4 17.7 68.9 27 106.1 27h.1c122.3 0 224.1-99.6 224.1-222 0-59.3-25.2-115-67.1-157zm-157 341.6c-33.2 0-65.7-8.9-94-25.7l-6.7-4-69.8 18.3L72 359.2l-4.4-7c-18.5-29.4-28.2-63.3-28.2-98.2 0-101.7 82.8-184.5 184.6-184.5 49.3 0 95.6 19.2 130.4 54.1 34.8 34.9 56.2 81.2 56.1 130.5 0 101.8-84.9 184.6-186.6 184.6zm101.2-138.2c-5.5-2.8-32.8-16.2-37.9-18-5.1-1.9-8.8-2.8-12.4 2.8-3.7 5.6-14.3 18-17.6 21.8-3.2 3.7-6.5 4.2-12 1.4-5.5-2.8-23.2-8.5-44.2-27.1-16.4-14.6-27.4-32.7-30.6-38.2-3.2-5.6-.3-8.6 2.4-11.3 2.5-2.4 5.6-6.5 8.3-9.8 2.8-3.2 3.7-5.5 5.5-9.2 1.9-3.7.9-6.9-.5-9.7-1.4-2.8-12.4-29.8-17-40.7-4.5-10.7-9-9.2-12.4-9.4h-10.6c-3.7 0-9.7 1.4-14.8 6.9-5.1 5.6-19.4 19-19.4 46.3 0 27.3 19.9 53.7 22.6 57.4 2.8 3.7 39.1 59.7 94.8 83.8 13.2 5.8 23.5 9.2 31.6 11.8 13.3 4.2 25.4 3.6 35 2.2 10.7-1.6 32.8-13.4 37.4-26.4 4.6-13 4.6-24.1 3.2-26.4-1.3-2.5-5-3.9-10.5-6.6z"/></svg></a>
                            <a href="https://t.me/share/url?url=<?php echo $post_url; ?>&text=<?php echo $post_title; ?>" target="_blank" rel="nofollow" class="si s-tg"><svg viewBox="0 0 448 512"><path d="M446.7 98.6l-67.6 318.8c-5.1 22.5-18.4 28.1-37.3 17.5l-103-75.9-49.7 47.8c-5.5 5.5-10.1 10.1-20.7 10.1l7.4-104.9 190.9-172.5c8.3-7.4-1.8-11.5-12.9-4.1L117.8 284 16.2 252.2c-22.1-6.9-22.5-22.1 4.6-32.7L418.2 66.4c18.4-6.9 34.5 4.1 28.5 32.2z"/></svg></a>
                            <a href="https://twitter.com/intent/tweet?text=<?php echo $post_title; ?>&url=<?php echo $post_url; ?>" target="_blank" rel="nofollow" class="si s-x"><svg viewBox="0 0 512 512"><path d="M389.2 48h70.6L305.6 224.2 487 464H345L233.7 318.6 106.5 464H35.8L200.7 275.5 26.8 48H172.4L272.9 180.9 389.2 48zM364.4 421.8h39.1L151.1 88h-42L364.4 421.8z"/></svg></a>
                        </div>
                    </div>
                </div>
            </div>
        </div>
        <style>
            .pb-box { padding: 2px; background: linear-gradient(90deg, #1e73be, #9b51e0, #f2994a); border-radius: 12px; margin-bottom: 25px; width: 100%; }
            .pb-inner { display: flex; align-items: center; background: #f9f9f9; padding: 10px 15px; border-radius: 10px; }
            /* ...বাকি CSS স্টাইল এখানে থাকবে... */
        </style>
        <?php
    }
}
Watch the Video Tutorial
If you have any difficulty understanding the steps above, don’t worry! Simply watch the video tutorial below and follow each step carefully.
The video demonstrates the complete process of adding the Author Box and Social Share Buttons to your WordPress website, making it easy for beginners to follow along.
By following the video, you’ll be able to install, customize, and activate your Author Box without any confusion. Just pause the video whenever needed and complete each step at your own pace.
Final Thoughts
I hope this tutorial has helped you learn how to add a beautiful Author Box and Social Share Buttons to your WordPress website in 2026. These simple additions can make your website look more professional, improve user engagement, and encourage visitors to share your content across social media.
If you followed each step carefully, your Author Box should now be working perfectly. If you run into any issues during the installation, feel free to leave a comment below—I’ll be happy to help you.
If you found this guide helpful, please share it with your friends and fellow WordPress users. Stay connected with PriyoBlog for more WordPress tutorials, SEO tips, and the latest technology updates.
Thanks for reading, and happy blogging!









Leave a Comment